Sipping Chocolate

Ever since reading Calico Captive as a teenager, I have been fascinated with the idea of sipping chocolate.

This year I actually made it a couple times during the holidays, and may very well make it again as the winter progresses.

It’s very good.

So much depends on the chocolate you use, but I’ve actually really enjoyed my Costco brand chocolate chips. Who knew, right? I should really try it with some of the fancy organic fairtrade $4/bar chocolates and see how that changes the experience, but so far the chocolate chips are doing the trick.

untitled shoot-1449.jpg

One of the really fun parts is garnish–or whatever else you call the last  finishing touch ingredient. So far my favorite is cinnamon sprinkled on top, but cinnamon with a spit of hot chili powder is also good. You could also use whipped cream, or whipping cream straight, lavender or rose (if you like drinking flowers), orange zest, fancy salt, vanilla sugar…Lindt bar flavors are great inspiration for chocolate toppers.

untitled shoot-1448.jpg

Cheers!

IMG_1489.jpg

IMG_1488.jpg

The Recipe (adapted from the Tasty Kitchen Blog)

3 c whole milk

1/2 c heavy cream

8 oz chocolate finely chopped

1 tsp maple syrup or honey (I used honey)

1 tsp vanilla extract (I used homemade bourbon vanilla extract)

dash salt (brings out the flavor)

Warning: This is a really, really rich drink. Tasty Kitchen says it makes 4 servings. You have to have a serious capacity to down chocolate to only get 4 servings out of this. You could generously serve 6, or comfortably serve 8. This recipe does alright the next day chilled, though, so leftovers are not the end of the world.

Warm the milk and cream to nearly a simmer, add the chopped chocolate and whisk till melted. Add the honey, vanilla extract and dash of salt. Simmer and whisk about 4 minutes until starting to thicken.

Serve with cinnamon or whipped cream. Or both. Sky’s the limit.

Gluten free Peanut Butter Cups

I love peanut butter cups–that is, I love my peanut butter cups. So does Zorro. I always dig out the recipe and then realize in surprise that I don’t follow it.

It’s not that there is anything wrong with the recipe, it’s just that I have a near-celiac friend and started converting things to gluten free. This is one of the rare things which is actually better that way–plus it’s much better for you. What with raw honey instead of sugar, no wheat, and just a bit of chocolate and butter fat. It’s like melted trail mix now.

untitled shoot-2392.jpg

I forgot I usually use honey and used powdered sugar this time…whoops. It’s what I get for cooking and watching Agents of Shield at the same time.

Tasted good.

untitled shoot-2361.jpg

I’ve finally gotten better at the art of pouring peanut butter–most of the peanut butter is in the cups this time around! Woot!

untitled shoot-2362.jpg

So here you go, I’ve now written down what I actually do when I make peanut butter cups. When I’m not distracted by a tv show and trying to remember what I do instead of following the recipe.

18504885139_a3cf216a3e_z

Gingerbread Star Wars

Full disclosure: This project was actually completed in 2013. But it’s still pretty epic. 

There is that one picture of an AT-AT made by a baker in CA that has dominated the gingerbread geekdom and it really made me want to try making a geeky work of gingerbread myself. I’m really not sure if it were me or Zorro who said we should make it, but I got in the supplies, called in Zorro’s siblings, and whipped up the dough. I also came up with one twist for our AT-AT which solved the problem of structural soundness.

He was a happy AT-AT, and he tried to go ice skating.

Zorro made a schematic, then he and the Minstrel spent forever measuring and cutting pieces. We decorated gingerbread cookies while it baked, and then the gluing and waiting and then  finally decorating took place. We started working on the schematics at 1 in the afternoon, I think they put the finishing touches on around 11 that night!

I’m so excited for how it turned out!

at-at-4316

at-at-4317


at-at-4318

11533706173_e353f5e7e5_z

We had some leftover dough and made the shield generators, and tried to make an x-wing, but it came out more as an imperial shuttle. It tried to ice skate, too.

11533577695_a0a627c66b_z11533621944_5bf1dfba7a_z11533656046_fe68d0128f_z

Merry Christmas!

Garden Mint Ice Cream

The most accurate title for this recipe would be Mint Hybrid Ice Cream (or mint throwback) because the mint I used is from my mother’s garden–and the result of free mingling of spearmint, chocolate-mint, and probably peppermint. I guess calling it Garden Mint is almost the same thing.

I got the idea from David Lebovitz and his wonderful ice cream cookbook, The Perfect Scoop (go buy it if you want to make ice cream, please).

If you asked, I’d say first that it was his recipe. Then I would realize that my ice cream base is entirely different from his–which means that my recipe looks entirely different. Even though the idea, and the method for extracting flavor were learned from his book.

I love that his book teaches you how to make ice cream, not just following recipes.

I’ve also had the help of some family friends with learning the science of it.

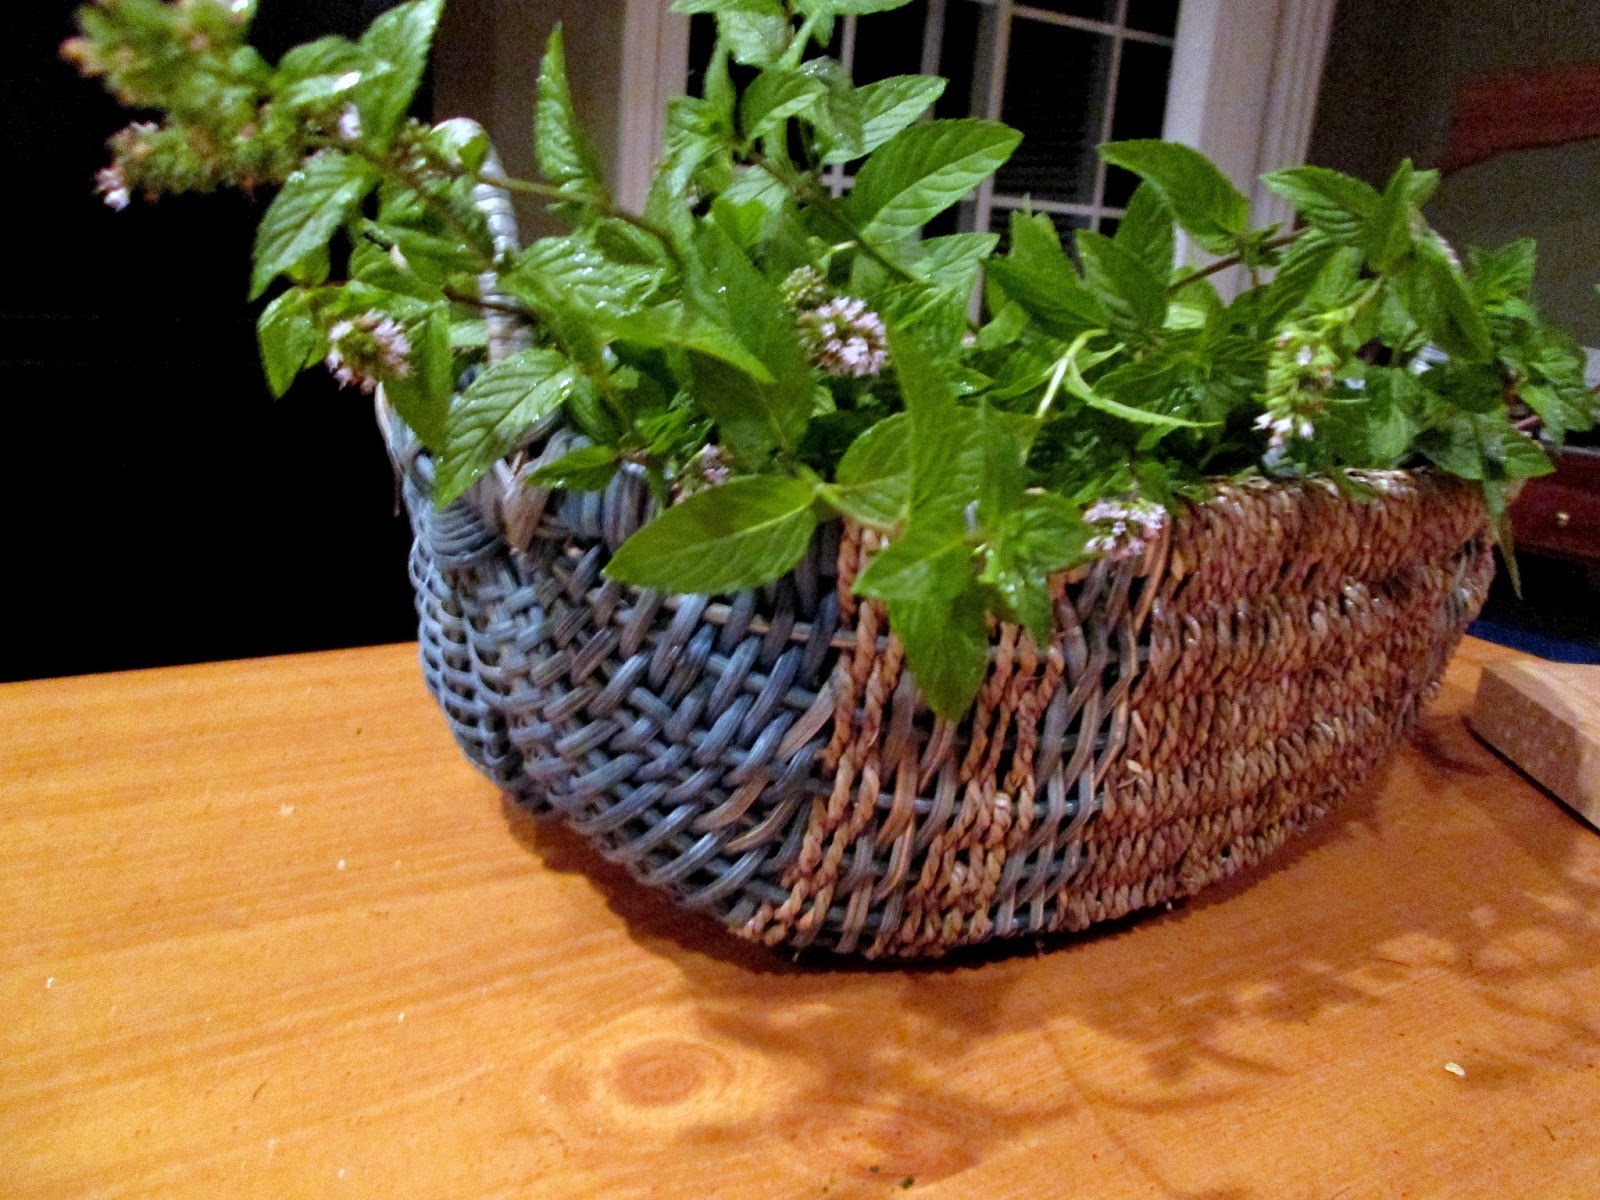
Sorry for the dark picture…it was night when I picked the leaves and used them…

The Minstrel was leaving for college, and I had promised him a batch of dark chili chocolate ice cream–and I wanted to make this mint ice cream to go alongside (and also so he didn’t HAVE to share) so I literally made ice cream every night for three days one week.

The mint batter I started on Wednesday, then finished on Thursday. I also made the chocolate batter on Thursday. Then Friday I churned the chocolate as soon as I returned from work, and stayed up till midnight to churn the mint (freezing element has to refreeze…) because I wouldn’t have time on Saturday to churn before I left in the morning. And in the evening we were meeting the family for a goodbye cook out.

My ice cream, the chocolate flavors in particular, has had texture issues. Even before I started messing around with making up my own recipes, my ice cream tended to come out hard as a rock once it froze. The chocolate was the worst, and we would actually use a butter knife to hammer out wedges of ice cream. It tasted amazing, but I wasn’t 100% sure I could really call it ice cream at that texture.

The only ice cream whose texture I nailed every time was my ginger ice cream–the first recipe I cobbled together myself after extensive reading.

Some more reading, reflection, and an astute friend pointing out the milkfat in chocolate…I decided to try upping the emulsifier for both the recipes.

Liquid sweeteners (from high fructose corn syrup to honey) and egg yolks are emulsifiers. They defy freezing. Egg whites are stiffeners, which is why most ice cream recipes say to use egg yolks only.

I never know what to do with 5 orphaned egg whites, so I took a cue from a Ben & Jerry cook book and just used 2 eggs (but cooked them, which Ben & Jerry do not). Two eggs was clearly not enough for the chocolate, so I upped it to 3 eggs, and added more honey to the recipe.

Bingo.

I did the same for the mint and that ice cream is actually the easiest one to scoop in the freezer. Our UCONN flavors have to sit out a couple minutes–even with our fancy Midnight Scoop.


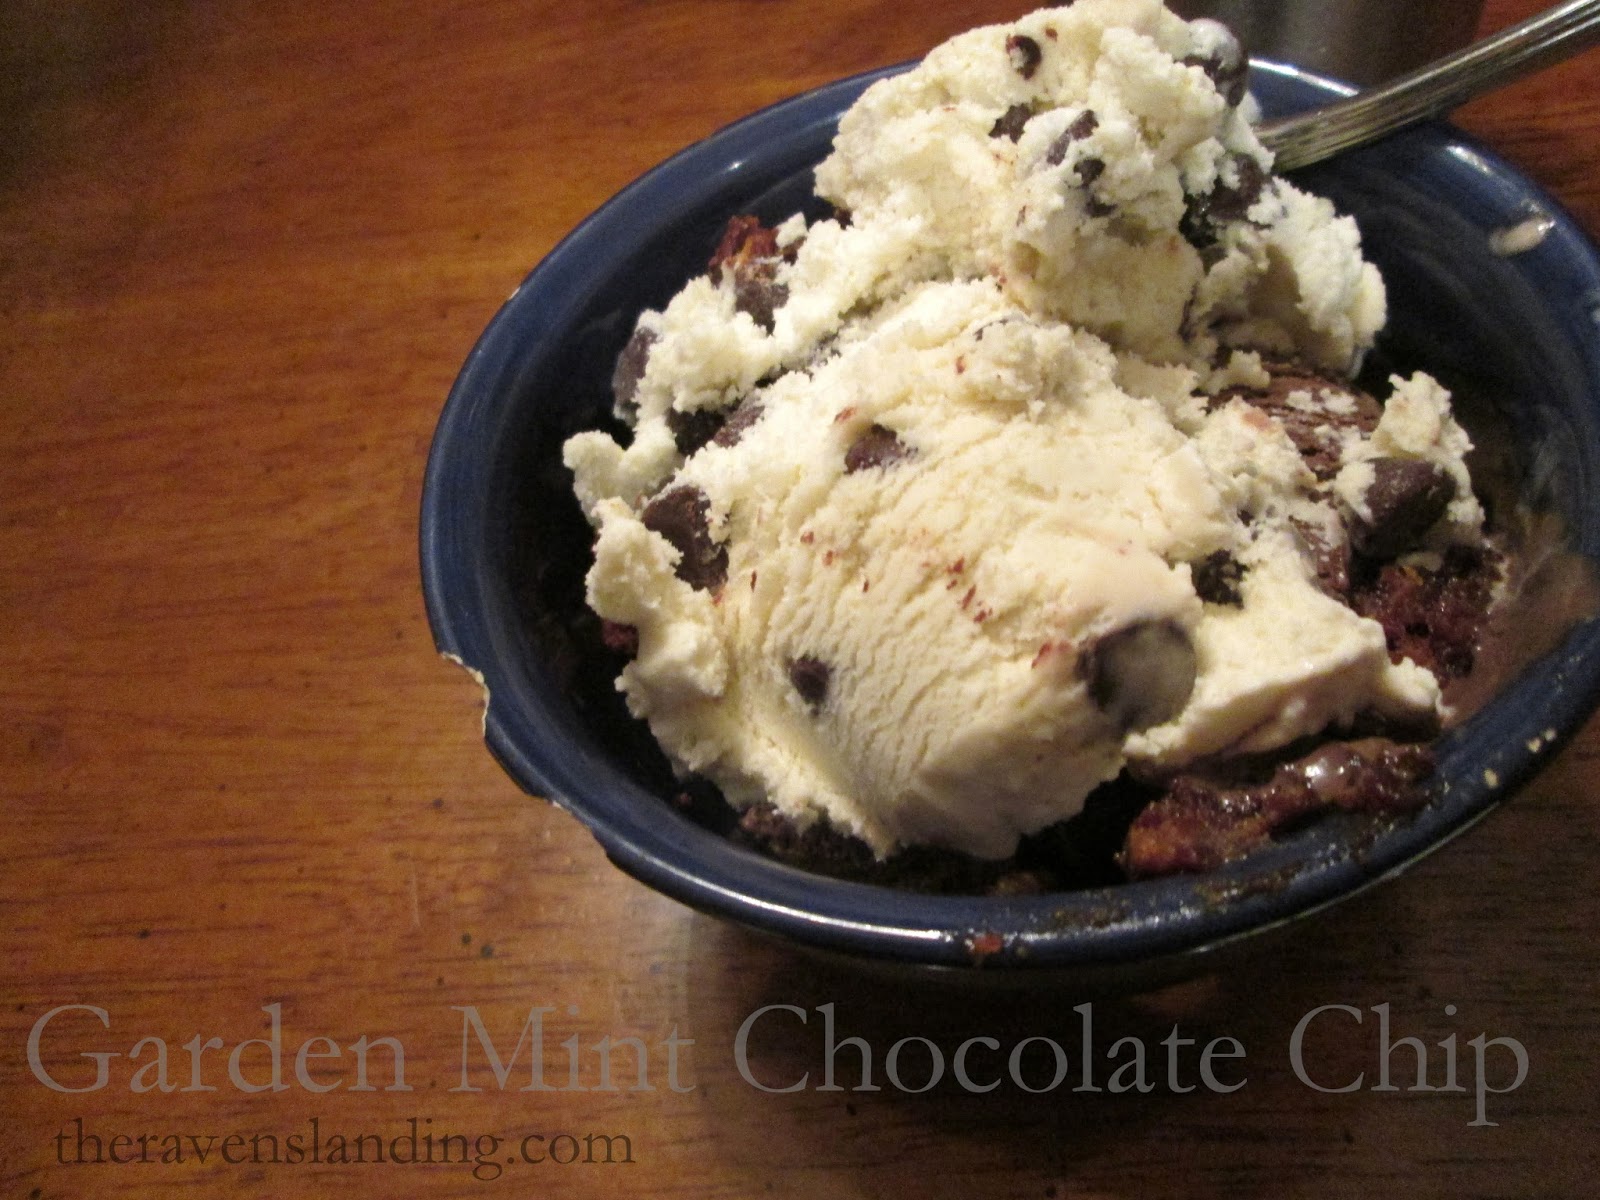
The Garden Mint Ice Cream Recipe:

1 cup whole milk

1/2 cup sugar

3 T honey

2 cups heavy cream

3 eggs

2 1/2 cups lightly packed mint leaves (that whole basket of mint pictured above made about this amount of mint leaves, just for reference).

1 cup semi sweet chocolate chips

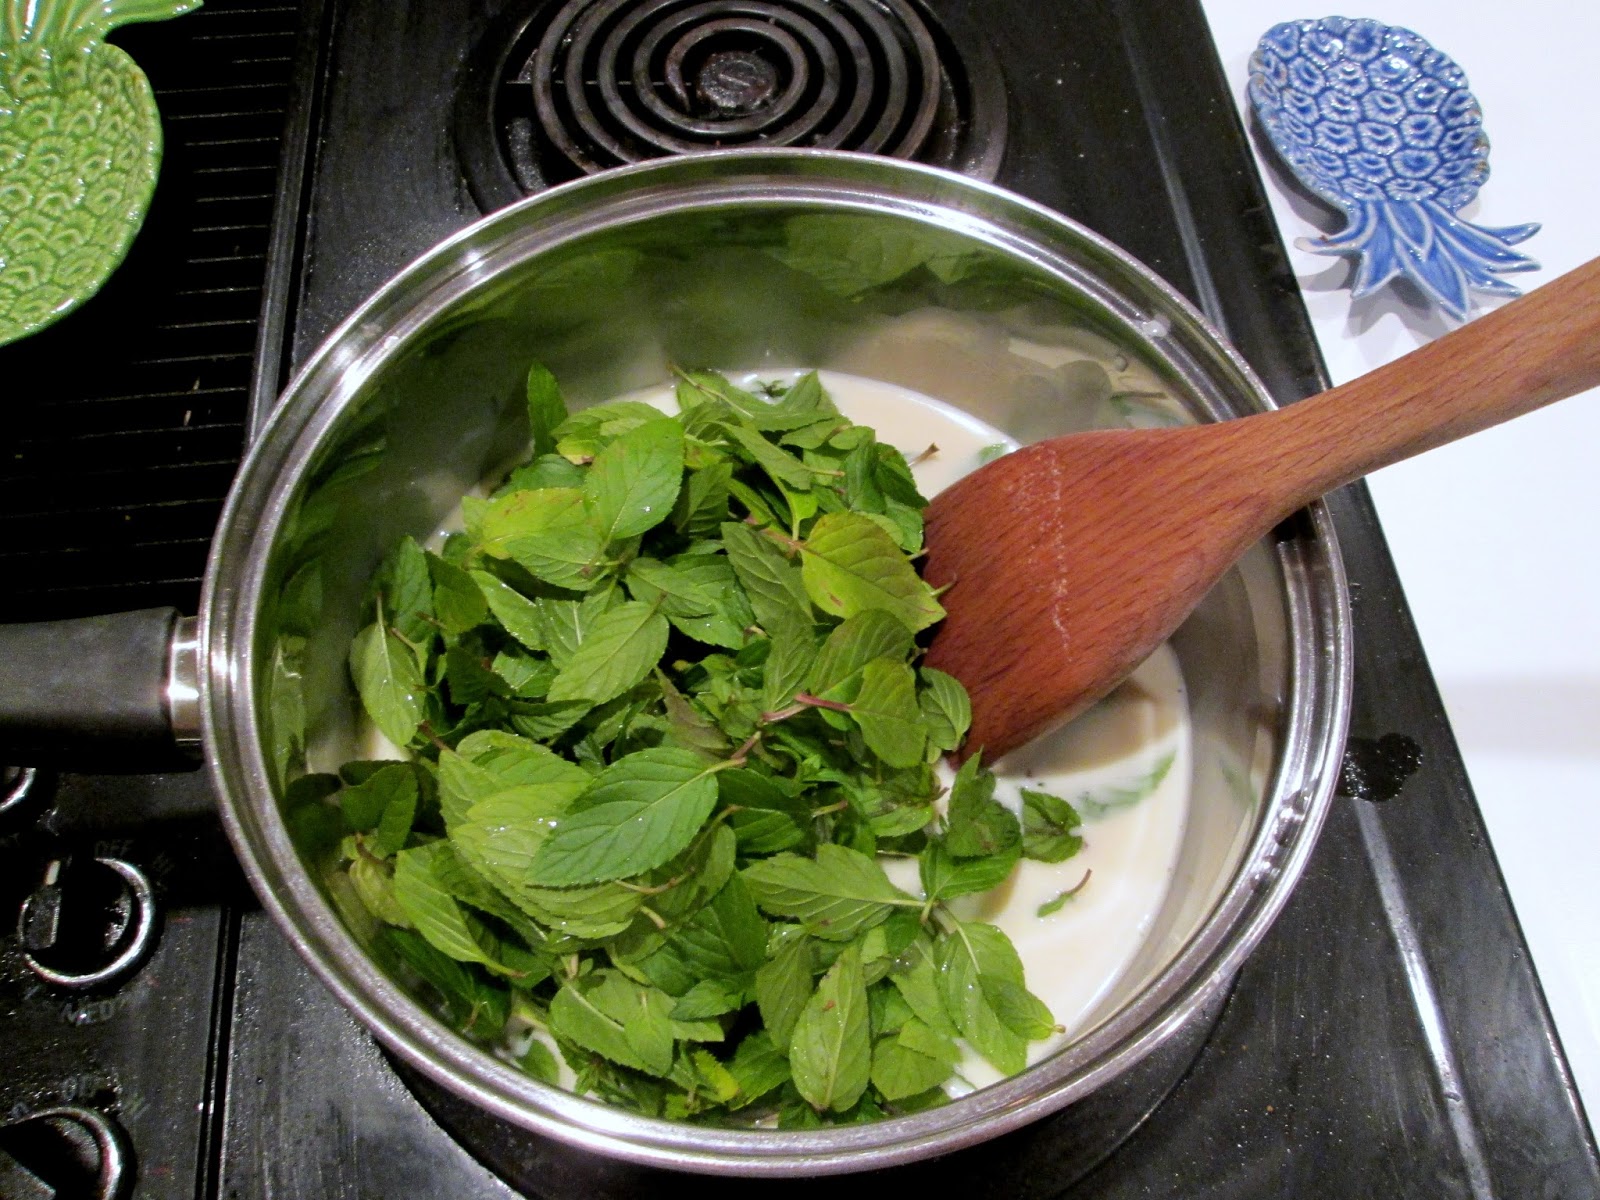
Warm the milk, sugar and honey on medium/low heat in saucepan, stirring frequently. Add your mint leaves and remove from the heat. Let mixture sit at room temperature for at least an hour. Mine got a couple hours, then overnight and all day in the fridge. Mash up those leaves with a spoon at any point in this process. If you refrigerate there may be some fat separation, in which case you’ll want to warm the mixture slightly before straining it so you don’t strain out your thick cream. Strain your minty milk into 1 c of cream in a nice big bowl where all the ice cream batter can gather later.

Whip 3 eggs until fluffy. Forks are best for this.

Warm 1 c heavy cream, pour into the fluffy eggs. (The reason you pour the cream slowly into the eggs, and not vice versa, is the heat. You do not want to cook your eggs on impact. It makes your ice cream taste like cooked egg and also makes your ice cream harder to scoop.) Then return to the sauce pot and warm on medium/low heat stirring constantly until the mixture is thick enough to coat the spatula. Remove immediately and pour through a mesh strainer into the minty cream.

Refrigerate until cool–this could take 3-8 hours, or you can let it sit for a night and a day like I did. Follow your ice cream maker’s instructions for churning once the batter is cool. Add the chocolate chips once it starts to look like softserve in the ice cream maker. You can stir it in with a spatula later if you forget, though…like I did…*cough*

I love this flavor. It might be my new favorite.

Watercolor landscape

Landscapes have never really been my thing. I get bogged down in details, it takes forever, looks wrong, and I find it both frustrating and less interesting than people or horses. In spite of this, occasionally I want a landscape on my wall, or want something other than stark white paper behind my heroically posed main subject.

So, I learn.

The most useful thing I’ve learned in these watercolor courses is to focus on light and dark. It helps you focus on what’s really there, rather than what you think you see.

I’m finding that I like the results of my concentrated practice, even if it doesn’t look exactly like the reference photo, it’s still pretty.

20161201_074826